Showing posts with label brewing. Show all posts

Thursday, October 27, 2011

How to pour an over carbonated beer

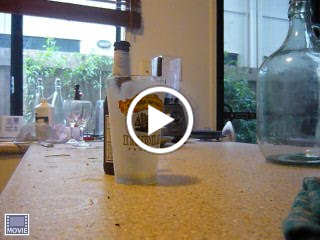
Here is a short video on the best way I have found to poor a beer which is over carbonated.

This is a American Style Dark IPA (Cascadia Dark Ale) which is over a year old now and damn damn tasty.
A side note while you watch the video if you get bored....
I was reading about seaweed (of course I was right?) and it turns out that seaweed improves with age as long as it is stored properly. "becoming sweeter as complex carbohydrates fragment to simple sugars, and meatier as proteins fragment to amino acids." Very interesting. This would apply to many things... Something to think about.


Saturday, September 24, 2011

Spring Hops 2011

 Perle Hops coming up strong!

Cascade coming up now as well! Top pic is the first shoot and the bottom is the root coming up with lots of nodules. I'll mound (cover with dirt) it up tomorrow and hope they come through strong. 


Wednesday, July 27, 2011

New brew pot

It's massive!! 70L woot!!


Saturday, July 2, 2011

American Boot to the Head - Failure or Fantastic?

Some of you might know my friends Eric and Adge from the States came over for a visit. While here Eric helped me brew up an American Style Pale Ale

The brew went great until the end. As some of my more avid readers out there will know, what do you mean there are not avid readers? Okay if you go back and read my old posts you'll see I have been getting brewing plumbing parts to help progress further... Anyhow, I had never used these before and most of them worked fantastically... Until the end

The whirlpool and side pickup to remove the wort from the kettle got blocked by the fresh hops and drastic measures were taken.

Infection was very high on the list to say the least....................

The fermentation kicked off fine and I left it for a solid 2 weeks + a few days for good measure.

I bottled all 30 some odd bottles with mixed feelings. That contamination at the end... I was worried...

Waiting a week I cracked on open just as a taste test, carbonation wasn't in full swing because I keep mine at a lower temp to get a finer bubble. Technical stuff aside I didn't expect any carbonation (This is important trust me you louts). What I got was the following

On the nose:
Banana
Sweet malt
A sure sign of contamination!


Taste:
Bitter and sweet
Malty but leaning towards the mild side

CARBONATION

My fears were confirmed. The whole batch was ruined!

However, I am ever the optimist. I let them sit for another 3 weeks just in case I was crazy. During those three weeks I organised all the beer being aged and this weekend I went out and saw something odd. One of the Session Pale Ale's had crap in the neck of the bottle. Inspecting others I found the same scattered through my collection.

Problem? Damn Woolworth's shitty caps and maybe my caper which is an old one handed down to me from Peter (Kasey's dad).  Ultimately it's my fault for being slack and getting crappy caps at woolies. Damn them though!

So throwing two into the fridge I did a blind tasting on Kasey not telling her I thought the batch was infected (How nice am I?!) and she came back with

Lightly malty, Quite bitter but nice

I thought to myself... She is being nice this can't be right.... So I tried it and combining her notes and mine

On the nose:
Light malt, hint of hops

Taste:
Very bitter (Astringency )
Lightly malty flavor
Tasty!


More of the floral hops would have been nicer but this but since we didn't dry hop all our aroma would have come from the last 5 minutes on the brew and with all the screwing around at the end I think the temp was too high for too long before we could start cooling.

Still nice beer :)


For some of you who have made it this far down the screen, I have been testing my beers on anyone and everyone and to date we have two winners. One I think would fit in with Australia now and one which might take 5 years before its ready to hit the market.

Session Pale Ale 2 is a big hit

Eric Killer 2: Oil Barrel now to be named Oil Barrel because it didn't kill Eric (Sorry Adge, life insurance will have to come in another way).

Both are hoppy fantastic but Oil Barrel takes a hop head to suck it down and go back for a second.

Over and out!

Thursday, April 28, 2011

Esky (Cooler) conversion

Second post of the day! I was busy on the weekend after my parts from bargainfittings.com arrived :)

This was a pain in the ass build I don't mind saying. My esky has a HUGE wall and bulkhead kit was not long enough to make it through with enough threads. So out came the drill! Punching through with enough to absorb that nut shown below but not enough to go over the soldered washer.

Why did I do this? The solder is under the gasket show below and I wanted that outside not inside and it gave a little more room inside.


3x 1/2" NPT Washer 304 stainless
1x Stainless steel mash braid
1x flat silicon gasket
1x silicon o ring
1x 1/2" SS Camlock Dust Cap Style Quick Disconnect
1x 1/2" SS Camlock F style fitting Quick Disconnect
1x 1/2" SS Camlock B Style Quick Disconnect
1x 3 - piece SS ball valve 
1x 1/2" NPT FEMALE x 1/2" hose barb


This might seem excessive, but I want to continue to use my esky for beer and ice! So I added a quick release and cap so I can disconnect my ball valve and barb while not brewing.

Internal is the braid, 2x SS Washers (Needed to chew up some thread) and a flat silicon gasket. The hex nut show in the soldered keg bulkhead at the top is in the esky wall, hence the drilling.

The outside is a silicon o ring with a third washer and the SS Camlock F style fitting Quick Disconnect. I put one on the floor on the left. The threads are on the concretion floor. The SS Camlock Dust Cap Style Quick Disconnect is shown attached to the esky keeping the water in and acting like a normal bung. On brew day I'll remove the dust cap and attach the ball valve show here in the picture with a SS Camlock B Style Quick Disconnect attached to the ball valve.

It will attach as so

Woot :D

When I get my next big kettle I'll be moving away from the esky to an insulated pot and all of this SS gear will transfer perfectly to the new mash tun.

No more (Or less) burned hands from wort transfer now! :)

Hop Back Build

Bit of a long time since I have posted but here goes!

Today I got my parts from bargainfittings.com (Shame on your Australia for boosting prices. I kick you in the nads!)

Now on with the build!

304 Grade Stainless Steel
http://www.ashnjuls.com.au/Stainless-Steel-Food-Storage-Airtight-Canister-p/taihsinjuniorcanister1800.htm


Its a bit expensive but I believe in quality so well worth the price.

Next was the fittings.

2 x 1/2" NPT Female x 1/2" Barb
2 x 1/2" NPT flat silicone gasket
1 x 1/2" Silicon O Ring
2 x 1/2" NPS locknut
1 x 1/2" NPT nipple 2" long
1 x Keg Bulk Head Kit


Now if you have never worked with a curve surface and SS, I suggest extreme caution. Also, get as much SS 316 as possible, 304 is the next best thing but I wouldn't go any lower then that. Go for quality! Okay enough of the public service announcements on to the construction

I started a pilot hole with a smaller drill on the upper side of the canister. From there I got my step bit for drilling SS, should be able to find these at any big hardware store or the fittings place listed above.

After burning yourself a few times on red hot SS metal you should have a hole about 1/2" around. Keep checking as you drill. Then get a grinder for removing any nasty SS edges. Its hard I know, I spent good part of 2 hours drilling, grinding and polishing. The second hole is at the bottom. Here is a photo to help you on your mental imaging.


Now time to attach the plumbing!

To the top section I used the 2" nipple and put the barb naked on the outside without a gasket, I don't think it will need one but time will tell. Inside I put a silicon o ring because I couldn't get the gasket to fit and a locknut to tighten it all down. It was a hard fit but I got it on :)


I did this so the hot wort would spill out into the middle of the canister instead of close to the side of the canister and might not take advantage of all of the hops.

The bottom is a locknut and gasket inside and the outside is another gasket with a barb on the end. The connecting piece is part of the keg bulk head kit
As this is linked image I'll drop them a line 

I have done water tests with it and it seems to hold just fine! Perfect.

Sunday, August 15, 2010

Brewing Day - Pale Ale

Well its brew day and I thought to show off some of my gear I am using these days.

I am still slumming it with a 15 liter pot and 5 liter pot. I have moved my brew bag into an eski. This will be the first time I have done this but the theory is well thought out ;-)


After the water is done its time to prep the eski.


After this its time to add the water to the grain and watch the magic happen!

Yummy

After I drained the wort I end up with two pots full of sugary goodness!


And I get to use my new toy! This lets me measure the sugar content to tell me about what Alc % the beer will be.


Get a reading of 13 and convert that into SG to find I have about a 5.5% beer on the brew :)

Next up to add the hops as it boils. Digital scale, 20 bones! Not bad eh. It only goes up to 5kg but if I am doing 5kg of hops I am gonna buy a better scale.

While brewing I needed to get dinner on so slamo!


Note the beer in the picture is my last Pale Ale :) Ohh and the excellent salami there on the cutting board. Awesome.

After 90 minutes of boiling the wort and hops (and eating the pizza) was time to try out the new immersion chiller!


Doesn't look very swish but there is a small pond pump in there feeding ice cold water through my Stainless Steel coil and as it cools the brew the hot water comes back out the other end and back into the eski. 

Brought my wort from near boiling to 19C in about 50 minutes. I think it would have gone faster if I would have had smaller ice and remembered to add salt to the water. Next time.

For all you water conservationists out there, I am use the water in the eski to re-make the ice used. Neat eh?  I'll change the water out when it starts to smell.

Last thing.

I am doing an Open Fermentation on this bad boy. I will be leaving the top off the fermenter for 3 days. This should produce more esters (fruity charateristics) and then I'll seal it up for the long haul of another week. 

Here is the recipe I did today if anyone out there is following along.

AmountItemType% or IBU
5.00 kgPale Malt (2 Row) UK (6.3 EBC)Grain96.2 %
0.20 kgCaramel Wheat Malt (90.6 EBC)Grain3.9 %
25.00 gmMagnum [14.00%] (60 min)Hops38.9 IBU
20.00 gmPearle [8.00%] (60 min)Hops17.8 IBU
30.00 gmCascade [5.50%] (3 min)Hops2.3 IBU
1 PkgsAustralian Ale Yeast (White Labs #WLP009)Yeast-Ale

Beer Profile
Estimated Original Gravity: 1.058 SG (1.045-1.060 SG)Measured Original Gravity: 1.052 SG
Estimated Final Gravity: 1.015 SG (1.010-1.015 SG)Measured Final Gravity: 1.010 SG
Estimated Color: 14.8 EBC (9.9-27.6 EBC)Color [Color]
Bitterness: 58.9 IBU (30.0-50.0 IBU)Alpha Acid Units: 3.4 AAU
Estimated Alcohol by Volume: 5.6 % (4.5-6.0 %)Actual Alcohol by Volume: 5.5 %


Lastly. I am also doing an experiment using the yeast from the bottles of my last pale ale which is the Australian Ale Yeast listed above. It should be fine but only time will tell.

The next brew will be my 2nd brew of a Irish Red Ale. It will from now on be called the Irish Rebellion II : Yeast's Revenge

Brew out.

Wednesday, June 9, 2010

Wild bush mead and a mushroom

Last night I made up a bush mead composed of three different kinds of bush honey

255g YWorry bush honey (Honey from our friends place)
365g Tasmania bush honey
1.7kg QLD Bush Honey (From our beekeeper at the farmers markets)
2 bush lemons (From Ma's farm)
1 Vanilla bean pod (Wow expensive!)
Nutmeg


Total % Alc expected 14%

This time I made too much though! I had a full jug of 5 liters of must (Why does wine brewing call it must and beer brewing call it wort?) and I had some left over so I decided to try something I read about. Wild yeast fermentation.

There is viable yeast all around us and if they populate the must a unique kind of mead can be created!

So this end I took two wine carafes and made wild yeast traps for each.


Once I fitted the openings with the same material I use for brewing beer, we disucssed where to put these things to have different attacks at the same outcome.

We decided to put one inside and one outside.


One went up top (Warmer) and one went outside with the tomatoes :)
And just to cap everything off we had a large mushroom for dinner! How large? Blah blam!

Wednesday, May 12, 2010

Wheat Beer - All Grain first attempt

Well since everyone loves my hooch brew'n.

Ingredients:
Wheat Malt, Bel (3.9 EBC) Grain 2.50 kg
Pale Malt (2 Row) US (3.9 EBC) Grain 1.00 kg
Munich Malt - 10L (19.7 EBC) Grain 0.50 kg
Sterling (7.50%) Hops 28.30 gm
Hefeweizen Ale (White Labs #WLP300) Yeast 1.00 Pkgs
 

Now I don't have the White Labs yeast because they were out and the hops I swapped for sterling, but its not like anyone who reads this blog knows what the hell I am talking about anyhow so it doesnt mater :D

Here are some pics to get your interest up.

I use my hand to get an idea how much grain we are talking about


WHAT?! Not enough? Need more photos to get an idea?? Fine


How about a cat? That gives some idea of what we are dealing with? And by the way, clean counter tops and a sterile environment are KEY to a good brew.


Your still not getting it?


Uhh thats a lot of grain! Damn


Here are some action shots of the brewing in action


Now I have had endless troubles will cooling the wort (which is what you see in the picture above) from boiling temperature to 24-18C so I can add the yeast and go to bed. How should I tackle this problem? Big friggen ice cubes!

 now THAT is some ice cubes :D  Also that is filtered water ice cubes :D


So plunk they go and BAM I am on my way from 100C down to 24C in no time!


Tasting to be done in a month or so. Maybe another video? For now its time for my beauty sleep.

Thursday, May 6, 2010

Leatherwood and Macadamia Mead

Juice of one lemon
300g leatherwood honey - smells like a flower shop crazy stuff!
700g macadamia honey - nice and sweat
5 liters of filtered water
Wine yeast
Wine Nutrient

SG: 1.060  (This will give me about a 8-9% wine)

First off boil your water

Then get a good thermometer, I am very proud of my new digital one, and wait for it to get to 72C. Add your room temperature honey and the temp will drop to around 66C. Stir like mad! Keep watching the temp and if it drops below 66C kick a little fire under its ass to keep things going.

Your goal is to keep it at 66C for 22 minutes. This kills the bacteria in the honey but doesn't destroy the pollen fragrances. There is no need to boil it.

When your 22 minutes is up mix up your wine yeast and nutrient in a tea cup and set aside.

Wait for the honey mixture to cool to around 25-27C add your yeast and cool it down to 12-16C.

This one looks awesome, very light in color and still smells really nice. We will see what happens in a months time!

I should get about 5-6 bottles and I plan to do 4 as sparkling. So I will add more honey to the bottles and let them bottle ferment for a month or two to carbonate the little monkeys!

Monday, April 12, 2010

Spoils

Well we have just returned from Europe and found that a large painting fell and crashed behind our TV cracking open a home electricity network adapter (Think a big A/C looking adapter with a LAN cable connected into it). When the painting cracked open the device the power terminals were barely touching and caused a fault in the electrical system.

The safety switch in the circuit breaker box tripped and all electrical outlets lost power. Overhead lights or anything on a direct switch still worked.

Our fridges, however, are on outlet power so they lost power... Fast forward to the interesting stuff....

The beer and two meads are now ruined - I checked the temperature before throwing the switch back on and it was 31C!!!!! Damn all my insulation. Optimal temp is 18C.

So I am not going to even waste my time and try and 'hope' they come good over time, they have been sitting at this unacceptable high temperature for little under 2 weeks.

Good side of things, I get to brew again :)

Sunday, March 28, 2010

Irish Red - Sneak Peek

Well the Irish Red beer I did as an All Grain brew came out last week. I snappied a photo of the newly created brew and compared with Kilkenny (Like Smithwick's in America)

I grabbed two glasses that are identical and poured a Kilkenny into the one on the left and my newly fermented brew on the right :D


The Irish Red ale is now bottle fermenting to add carbonation so you get head and bubbles. Complete post about this beer once its done with the two months of bottle fermentation.

Grab an Irish Red Ale this weekend and try them!

Saturday, March 27, 2010

Wheat Beer - Kit style

Well its the weekend so time to brew up a storm!

I was going to do an all grain wheat beer brew (and still plan to) but I have run out of time, so I went down and grabbed the following


WB-06 Wheat Yeast
Imported Bavarian Wheat (Brew Craft)
Wheat Malt Extract (Coopers)
Hop Bag - Hallertau

This will sit in the brewing fridge for 3+ weeks which is longer then I normally let things go but I have been reading some interesting things about letting the first fermentation go for longer.

After this Kit Wheat I plan on doing an all grain wheat with 90% wheat where this style here is only 50% wheat.

If your reading this via reader then you won't see the side panel on the blog so since I am out of interesting shit to say I'll spew out the sideboard here.

Currently Drinking:
Store bought :(

Currently Aging:
Sparkling mead (18%) (April 12th)
Indian Pale Ale (Kit with added grains) (April 28th)
Irish Red Ale (all grain) (June 12th)

Currently Brewing:
Wheat Beer (kit) (April 17th)
Mead (10%) (May 1st done)
Braggot Mead (15%) (May 18th done)

Next to Brew:
Wheat Beer (All Grain)

Tuesday, March 23, 2010

Braggot Mead

Greetings all! The wife has the camera with her so no photos on this post.

Last week I started planning a Braggot Mead which is malt and honey, so think beer and honey with wine yeast.

So on with the recipe first!

500g Bush Honey
500g Rose Garden Honey
800g Pale Malt Grain
200g Light Crystal Grain
8 Cloves
2 Tea Bags
6 Liters filtered water
1 Demijohn
2 Pots
1 tea spoon Wine yeast
1 tea spoon Yeast Nutrient

So! I thought, I have all this left over grain and all this left over honey why not do a Braggot! It sounds cool Braggot. Go ahead give it a roll off the tong. BraaaaGOT!

So! I diverted from the normal school of thought that you boil the honey! Most mead recipes seem to come from beer makers and the boil is essential for killing off all bacteria and the work it does with the proteins. However! Like my other posts about mead I prescribe to the 68 degrees for 22 minutes for the honey to kill of the organisms that live in honey, but this deviates from beer making; So I combined the procedures into one limbo dance of justice and peace.

1. Poor your 5L of water into the first pot and bring to 75C.

2. Dump your grains in - I use a Brew Bag (google it)

3. Check the temp is about 65, insulate the pot if you can with towles etc. Check ever 15 minutes until 90 minutes have passed.

4. Heat the remaining 1L of water in the 2nd pot and sparge with the last 1L of water (Poor the water over the grains)into the first pot.

5. Bring to a rolling boil

6. Add cloves

7. 60 minutes later remove from heat and measure the temperature carefully! When it reaches 68C add the honey

8. Insulate and check every 3-5 minutes for 22 minutes.

9. While you are checking the Braggot wort - make up a tea cup of yeast, yeast nutrient and filtered water and let warm near pot. This gets the yeast party started early!

10. After 22 minutes aerate the wort. I don't own a aerator yet so I did the trick of pouring the wort between the two pots back and forth over and over and over and over till my arms fell off.

11. Add to demijohn and cool the wort down to 24-25C

12. Add your yeast party and top with an air lock!

13. Mark your calendar for 8 weeks, put it in the brew fridge and forget about it

This mead should be a spicy and full body wine. It might not fit the Australian climate but until it's brewed and aged we will never know!

Sunday, February 21, 2010

Munich Lager - First crack

Last video of opening beer left many people to doubt of the quality of my beer. I am providing another video here to help with this :)

From Brewing

Belgium Leffe Clone Beer

G'day all!

I decided to show how I go about getting the finished beer into the bottles. I tried a few more sexy setups earlier on - one of these setups the fermenter on the counter in the kitchen, myself sitting on the floor and putting the beer bottles up under the tap. The end results were some tired arms and beer on the floor and with three cats in the house it was a recipe for disaster.

So I moved the operation into the laundry room. It took me awhile to find something that could support the weight of the fermenter! That thing is freak'n heavy.

But as you can see I was able to find a suitable device. (A old P2 computer!)

This beer I left the hops in while it fermented. See the top bulge in the white bag at the top left? All hops :D

Keep in mind the previous post First All Grain Brew where I thought this was going to be a failure due to the color of the beer being DARK and not the light colored blond I was shooting for. Fortunately it came out ORANGE :D Which is an unexpected result but still better then a dark beer :) I am happy with this result because as the yeast stops partying and goes to sleep they settle onto the bottom of the bottles with the other sediment and the beer clears! Check the right side here for Chris' Cellar to see the dates and the current stage things are in.

Without further aduuuuuuu here are two videos shows the exciting process.

Please Click on each Image Below

From Brewing

Monday, February 8, 2010

First all grain brew

Well I took a dive head first into the deep end and I am not sure the pool had water...

I thought to myself - how hard could it be to brew beer from the base ingredients? So I found a recipe on aussiehomebrewer.com.au and decided what the hell!


 Recipe Source

5.7 kg BB Galaxy Pale Malt
0.45 kg Weyermann Munich I
0.3 kg Cane Sugar
0.15 kg Weyermann Caraamber
0.1 kg Weyermann Melanoidin
38 g Styrian Goldings (Pellets, 5.5 AA%, 60 mins)
20 g Saaz (Czech) (Pellets, 3.5 AA%, 15 mins)
2000 ml Wyeast Labs 1762 - Belgian Abbey II


So I went down to my local brew shop with this list and found everything even if I did have to sub out the recommended yeast with a dry yeast
With my ingredients acquired I rushed home to start in on true brewing.

Arriving at home I found the kitchen lacking certain things that I must have! The major one being a large pot!

So the next weekend Kasey and I headed to the army surplus store and found what was labeled to be a 20L pot! Score.

So grabbing this bad boy I rushed home ready to start in on my brewing excellence.

Once arriving at home with my pot I found that I was missing another major component. A false bottom is used in breweries for removing the grains from the liquid (which will be called WORT from now on) and as since my new shinny 20L pot didn't have a false bottom I went back to the net to solve my problem. The answer came in the form of a Brew Bag. A brew bag is a very fine mesh of material that you can brew in and then squeeze the wort from afterwards! So the following weekend we rushed to the linen store and got a large quality of this material. Kasey then started the long and arduous task of making a bag and incorporating a draw string. A week later and we are rocking!... Wait... ahh CRAP!

So the pot is 20L. My recipe is for making 20L. Sounds fine right? WRONG. I have about 10L of GRAIN, what the hell.... Thats 30L of stuff for my "20L" pot.

After a few messing around I found my "20L" pot was only 15L! Damn those surplus no measuring dirt grubbing .. grrr

Okay so I am all kinds of low class (see fridge) and there must be a "poor mans" way of doing this... So I split up the brewing :) 15L x 2. So I did half the grain in the pot. Problem is it takes 2 hours to brew the grains! That means I was sitting there for 4 hours watching this mess seep :)

Once it was done I transfered the bag to the garage to hang for an hour and I went to squeeze the shit out of it every 10 minutes
Once I had all that sorted out I transfered the 19L of wort to the 15L pot and another 5L pot. These then boiled with the hops for 90 minutes. It was suppose to be a light colored beer... Why is it dark? Ahhh shitty. Dark?! What the hell... Ohh.. I had the temperature too high when cooking the grains :P Guess it is a dark beer now.  :D

So this boiled and boiled and then I transfered all this into the fermenter... 14L.. WHAT?! AHH Crap! Evaporation.

And with the steam went the last of my resolve. My hope of exclaiming to the world that the new best Craft Beer artisan as entered into the arena and that success was just around the corner for this fine brew... Ahh screw it :P I boiled another 5L of water and tipped it into the fermenter. So while I was ripping up my business cards for Chris' Craft Beer I went to check the fermenter.

Wow... That fermenter is REALLY hot.... So hot that...

Oh no! Its way to hot to put yeast in! So I put it in the washing tub and filled it will cold water. An hour later? Still freak'n hot! So we went out to dinner. 2 and half hours later? Waaaa! Still freaken hot.. So while canceling my bid to buy that small brewery on the outskirts of town I sat and waited and waited.

So I stayed up and finally it go down to yeast bearable temperatures. I added the yeast and put the bad boy into the fridge!

Only time will tell if I made poison or beautiful dark beer. 

First Mead

Well I decided to pull the mead out and have a look / taste as I racked off to another demi-john.

WOW! What a taste! Its a bit young from what I have been reading but it was nice, sweet, fragrant and nicely alcoholic.

It could be aged for another 3-12 months and I will likely do that but in bottle form.

You can see at the bottom all the sediment which is the yeast, dead yeast and other partials.

This is the bit we don't want to take with us when we transfer (rack off) to the next demi-john.
With a helpful hand from Kasey we were successful!

We took a glass from the bottom so it would contain some of the yeast and other things we don't want to transfer and tried it. Wow! Great stuff. Like I said before sweet, fragrant and smooth. Had a hint of our honey and some of the smell as well.