 |
| From Brewing |
Sunday, February 21, 2010
Munich Lager - First crack
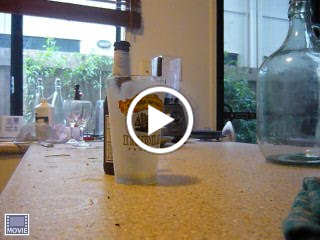
Last video of opening beer left many people to doubt of the quality of my beer. I am providing another video here to help with this :)
Belgium Leffe Clone Beer
G'day all!
 I decided to show how I go about getting the finished beer into the bottles. I tried a few more sexy setups earlier on - one of these setups the fermenter on the counter in the kitchen, myself sitting on the floor and putting the beer bottles up under the tap. The end results were some tired arms and beer on the floor and with three cats in the house it was a recipe for disaster.
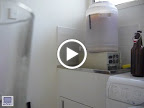
So I moved the operation into the laundry room. It took me awhile to find something that could support the weight of the fermenter! That thing is freak'n heavy.
 But as you can see I was able to find a suitable device. (A old P2 computer!)
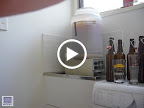
This beer I left the hops in while it fermented. See the top bulge in the white bag at the top left? All hops :D
Keep in mind the previous post First All Grain Brew where I thought this was going to be a failure due to the color of the beer being DARK and not the light colored blond I was shooting for. Fortunately it came out ORANGE :D Which is an unexpected result but still better then a dark beer :) I am happy with this result because as the yeast stops partying and goes to sleep they settle onto the bottom of the bottles with the other sediment and the beer clears! Check the right side here for Chris' Cellar to see the dates and the current stage things are in.
Without further aduuuuuuu here are two videos shows the exciting process.
Please Click on each Image Below
 I decided to show how I go about getting the finished beer into the bottles. I tried a few more sexy setups earlier on - one of these setups the fermenter on the counter in the kitchen, myself sitting on the floor and putting the beer bottles up under the tap. The end results were some tired arms and beer on the floor and with three cats in the house it was a recipe for disaster.
So I moved the operation into the laundry room. It took me awhile to find something that could support the weight of the fermenter! That thing is freak'n heavy.
 But as you can see I was able to find a suitable device. (A old P2 computer!)
This beer I left the hops in while it fermented. See the top bulge in the white bag at the top left? All hops :D
Keep in mind the previous post First All Grain Brew where I thought this was going to be a failure due to the color of the beer being DARK and not the light colored blond I was shooting for. Fortunately it came out ORANGE :D Which is an unexpected result but still better then a dark beer :) I am happy with this result because as the yeast stops partying and goes to sleep they settle onto the bottom of the bottles with the other sediment and the beer clears! Check the right side here for Chris' Cellar to see the dates and the current stage things are in.
Without further aduuuuuuu here are two videos shows the exciting process.
Please Click on each Image Below
 |
| From Brewing |
Monday, February 8, 2010
First all grain brew
Well I took a dive head first into the deep end and I am not sure the pool had water...
I thought to myself - how hard could it be to brew beer from the base ingredients? So I found a recipe on aussiehomebrewer.com.au and decided what the hell!
Recipe Source
So I went down to my local brew shop with this list and found everything even if I did have to sub out the recommended yeast with a dry yeast
 With my ingredients acquired I rushed home to start in on true brewing.
Arriving at home I found the kitchen lacking certain things that I must have! The major one being a large pot!
So the next weekend Kasey and I headed to the army surplus store and found what was labeled to be a 20L pot! Score.
So grabbing this bad boy I rushed home ready to start in on my brewing excellence.
Once arriving at home with my pot I found that I was missing another major component. A false bottom is used in breweries for removing the grains from the liquid (which will be called WORT from now on) and as since my new shinny 20L pot didn't have a false bottom I went back to the net to solve my problem. The answer came in the form of a Brew Bag. A brew bag is a very fine mesh of material that you can brew in and then squeeze the wort from afterwards! So the following weekend we rushed to the linen store and got a large quality of this material. Kasey then started the long and arduous task of making a bag and incorporating a draw string. A week later and we are rocking!... Wait... ahh CRAP!
 So the pot is 20L. My recipe is for making 20L. Sounds fine right? WRONG. I have about 10L of GRAIN, what the hell.... Thats 30L of stuff for my "20L" pot.
After a few messing around I found my "20L" pot was only 15L! Damn those surplus no measuring dirt grubbing .. grrr
 Okay so I am all kinds of low class (see fridge) and there must be a "poor mans" way of doing this... So I split up the brewing :) 15L x 2. So I did half the grain in the pot. Problem is it takes 2 hours to brew the grains! That means I was sitting there for 4 hours watching this mess seep :)
Once it was done I transfered the bag to the garage to hang for an hour and I went to squeeze the shit out of it every 10 minutes

 Once I had all that sorted out I transfered the 19L of wort to the 15L pot and another 5L pot. These then boiled with the hops for 90 minutes. It was suppose to be a light colored beer... Why is it dark? Ahhh shitty. Dark?! What the hell... Ohh.. I had the temperature too high when cooking the grains :P Guess it is a dark beer now. :D
So this boiled and boiled and then I transfered all this into the fermenter... 14L.. WHAT?! AHH Crap! Evaporation.
And with the steam went the last of my resolve. My hope of exclaiming to the world that the new best Craft Beer artisan as entered into the arena and that success was just around the corner for this fine brew... Ahh screw it :P I boiled another 5L of water and tipped it into the fermenter. So while I was ripping up my business cards for Chris' Craft Beer I went to check the fermenter.
Wow... That fermenter is REALLY hot.... So hot that...
Oh no! Its way to hot to put yeast in! So I put it in the washing tub and filled it will cold water. An hour later? Still freak'n hot! So we went out to dinner. 2 and half hours later? Waaaa! Still freaken hot.. So while canceling my bid to buy that small brewery on the outskirts of town I sat and waited and waited.
So I stayed up and finally it go down to yeast bearable temperatures. I added the yeast and put the bad boy into the fridge!
Only time will tell if I made poison or beautiful dark beer.
I thought to myself - how hard could it be to brew beer from the base ingredients? So I found a recipe on aussiehomebrewer.com.au and decided what the hell!
Recipe Source
 | 5.7 kg | BB Galaxy Pale Malt | ||
| 0.45 kg | Weyermann Munich I | ||
 | 0.3 kg | Cane Sugar | ||
| 0.15 kg | Weyermann Caraamber | ||
| 0.1 kg | Weyermann Melanoidin | ||
 | 38 g | Styrian Goldings (Pellets, 5.5 AA%, 60 mins) | ||
| 20 g | Saaz (Czech) (Pellets, 3.5 AA%, 15 mins) | ||
 | 2000 ml | Wyeast Labs 1762 - Belgian Abbey II |
So I went down to my local brew shop with this list and found everything even if I did have to sub out the recommended yeast with a dry yeast

Arriving at home I found the kitchen lacking certain things that I must have! The major one being a large pot!
So the next weekend Kasey and I headed to the army surplus store and found what was labeled to be a 20L pot! Score.
So grabbing this bad boy I rushed home ready to start in on my brewing excellence.
Once arriving at home with my pot I found that I was missing another major component. A false bottom is used in breweries for removing the grains from the liquid (which will be called WORT from now on) and as since my new shinny 20L pot didn't have a false bottom I went back to the net to solve my problem. The answer came in the form of a Brew Bag. A brew bag is a very fine mesh of material that you can brew in and then squeeze the wort from afterwards! So the following weekend we rushed to the linen store and got a large quality of this material. Kasey then started the long and arduous task of making a bag and incorporating a draw string. A week later and we are rocking!... Wait... ahh CRAP!
 So the pot is 20L. My recipe is for making 20L. Sounds fine right? WRONG. I have about 10L of GRAIN, what the hell.... Thats 30L of stuff for my "20L" pot.
After a few messing around I found my "20L" pot was only 15L! Damn those surplus no measuring dirt grubbing .. grrr

Once it was done I transfered the bag to the garage to hang for an hour and I went to squeeze the shit out of it every 10 minutes

 Once I had all that sorted out I transfered the 19L of wort to the 15L pot and another 5L pot. These then boiled with the hops for 90 minutes. It was suppose to be a light colored beer... Why is it dark? Ahhh shitty. Dark?! What the hell... Ohh.. I had the temperature too high when cooking the grains :P Guess it is a dark beer now. :D
And with the steam went the last of my resolve. My hope of exclaiming to the world that the new best Craft Beer artisan as entered into the arena and that success was just around the corner for this fine brew... Ahh screw it :P I boiled another 5L of water and tipped it into the fermenter. So while I was ripping up my business cards for Chris' Craft Beer I went to check the fermenter.
Wow... That fermenter is REALLY hot.... So hot that...
Oh no! Its way to hot to put yeast in! So I put it in the washing tub and filled it will cold water. An hour later? Still freak'n hot! So we went out to dinner. 2 and half hours later? Waaaa! Still freaken hot.. So while canceling my bid to buy that small brewery on the outskirts of town I sat and waited and waited.
So I stayed up and finally it go down to yeast bearable temperatures. I added the yeast and put the bad boy into the fridge!
Only time will tell if I made poison or beautiful dark beer.
First Mead

WOW! What a taste! Its a bit young from what I have been reading but it was nice, sweet, fragrant and nicely alcoholic.
It could be aged for another 3-12 months and I will likely do that but in bottle form.
You can see at the bottom all the sediment which is the yeast, dead yeast and other partials.
This is the bit we don't want to take with us when we transfer (rack off) to the next demi-john.

We took a glass from the bottom so it would contain some of the yeast and other things we don't want to transfer and tried it. Wow! Great stuff. Like I said before sweet, fragrant and smooth. Had a hint of our honey and some of the smell as well.

Tuesday, February 2, 2010
Mango Wine
Unfortunately no photos for this post. I am a total slacker. I'll take some photos of mangos and edit them in later ;-)
Recipe (All items are organic or filtrated water - QUALITY makes all the difference) :
10 Large Mangos
5 Limes
1 Earl Grey tea bag
2 Liters of Water
300ml of Honey (Yellow box)
Wine Yeast
Wine Nutrient
Juice the mangos and limes, add the water and the honey. Heat to 70C for a few minutes. Add the tea bag and let it seep for a few more minutes. Remove tea bag, and poor into demi-john. Cool the demi-john to blood temp. Add the yeast and the wine nutrient you have been growing in a standard coffee cup to the demi-john. Add the air lock.
Subscribe to:
Comments (Atom)